How To Create A Png Image In Photoshop
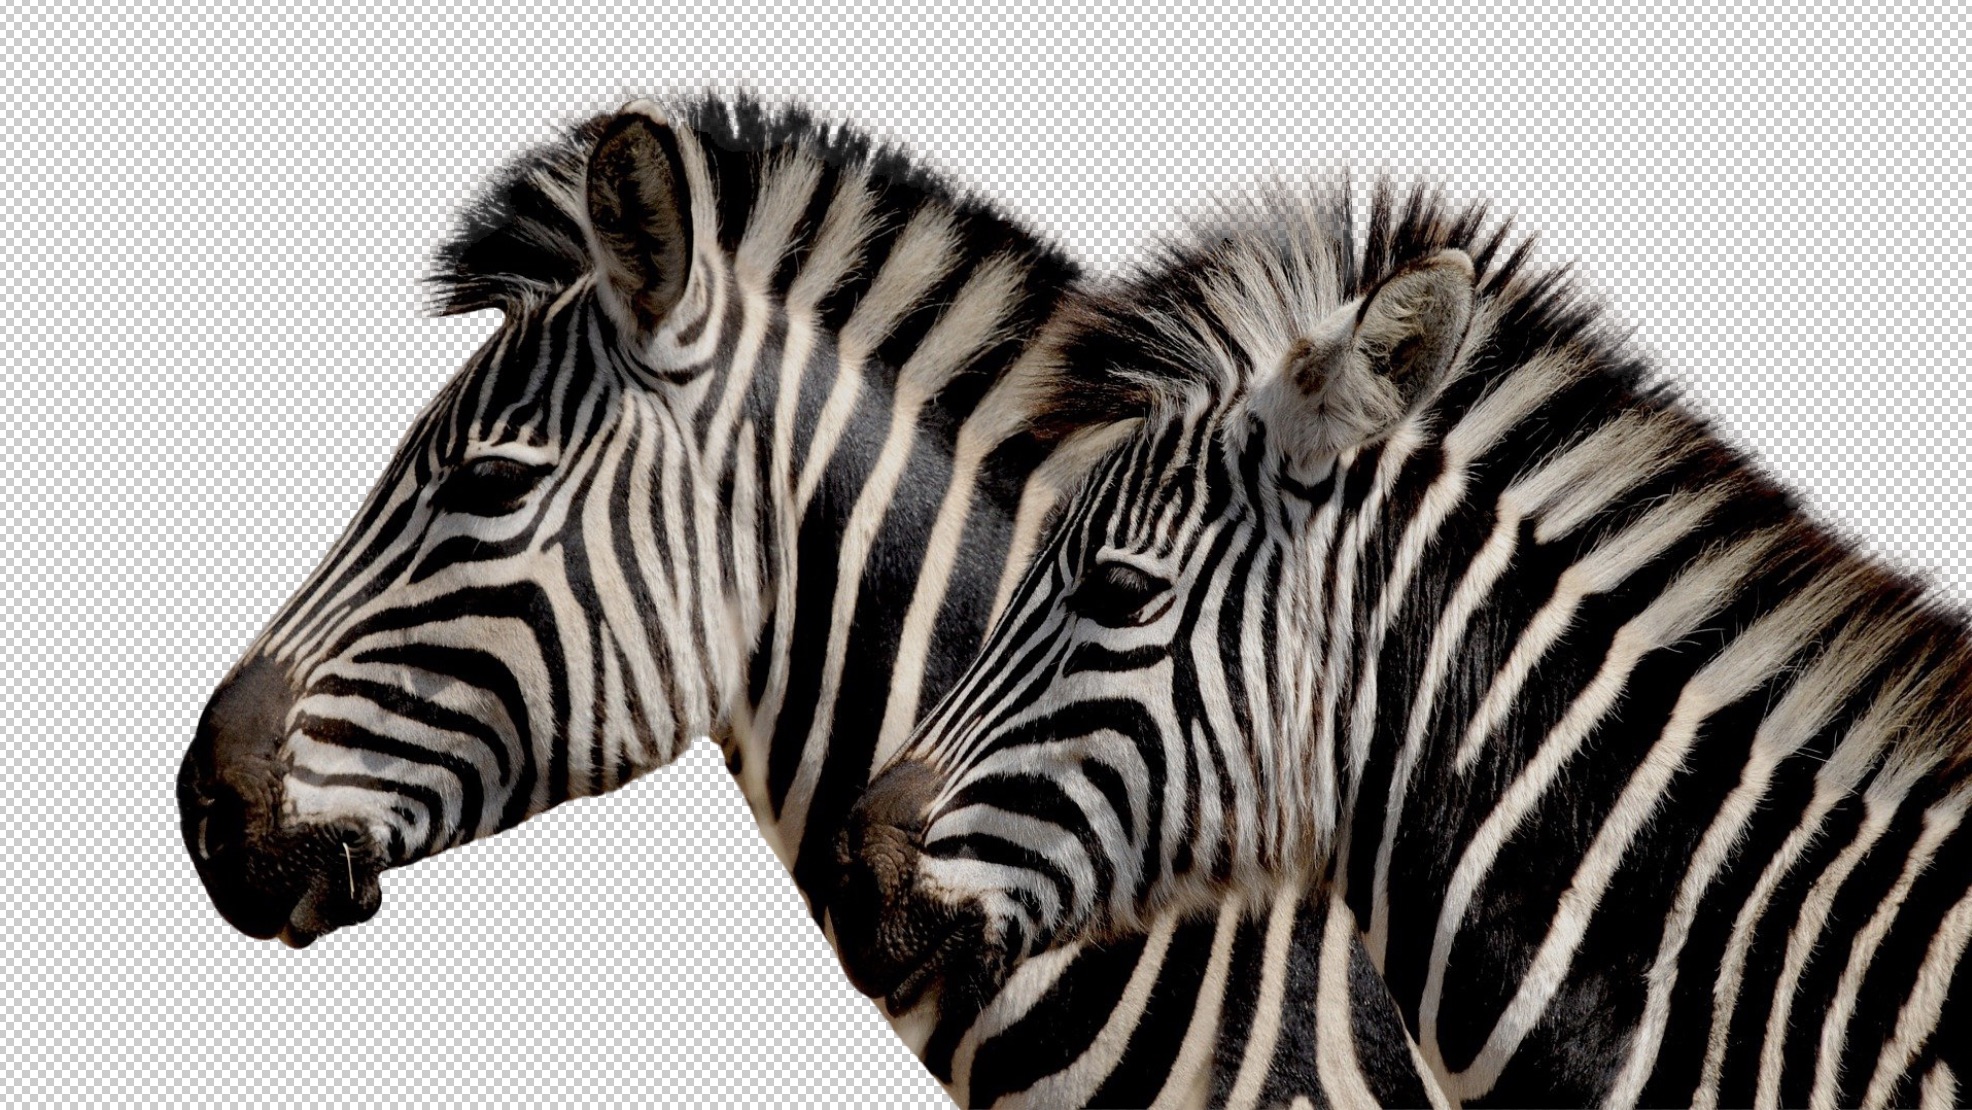
Having some basic notions about the different image formats that exist and about how to change an image from one format to another is essential if you want to improve your designs. PNG is one of the most used formats in graphic design, that's why I think it is important to know ttransform an image JPEG, format in which almost all those that we download from the internet are in a PNG. Adobe Photoshop is a great tool to do it and it is precisely one of the things that I will teach you in this post.
When we say that we want to create PNG images, I know that many of you are not only referring to changing the format, but you want to learn how to create an image with a transparent background. In this post I will also include a simple tutorial on how to do it in Photoshop. However, before getting into the subject, I will stop to explain what exactly a PNG is and what advantages this format offers.
Table of Contents
- 1 What is a PNG image?
- 1.1 When should we opt for this format?
- 2 How to create PNG images with Adobe Photoshop
- 2.1 Change the image format
- 2.2 Create images with transparent background with Photoshop
- 2.2.1 We open the image
- 2.2.2 How to make the selection
- 2.2.3 How to remove the background
- 2.2.4 Be careful when saving
What is a PNG image?
PNG is a file format that allows compress graphic information without loss, that is to say, theoretically in the compression the details of the uncompressed original image are not lost.
It is a very attractive format for graphic design because it behaves similar to that of a JPEG file, at least to inexperienced eyes like mine, it is capable of storing a total of 16 million colors and it offers a fundamental advantage: supports transparent backgrounds.
When should we opt for this format?
This format, created for the web, is the ideal if we are going to work with illustrations or if we are designing content for websites that need to maintain a good resolution, such as logos. It is also a useful format to create photomontages, collages and posters.
How to create PNG images with Adobe Photoshop
Change the image format
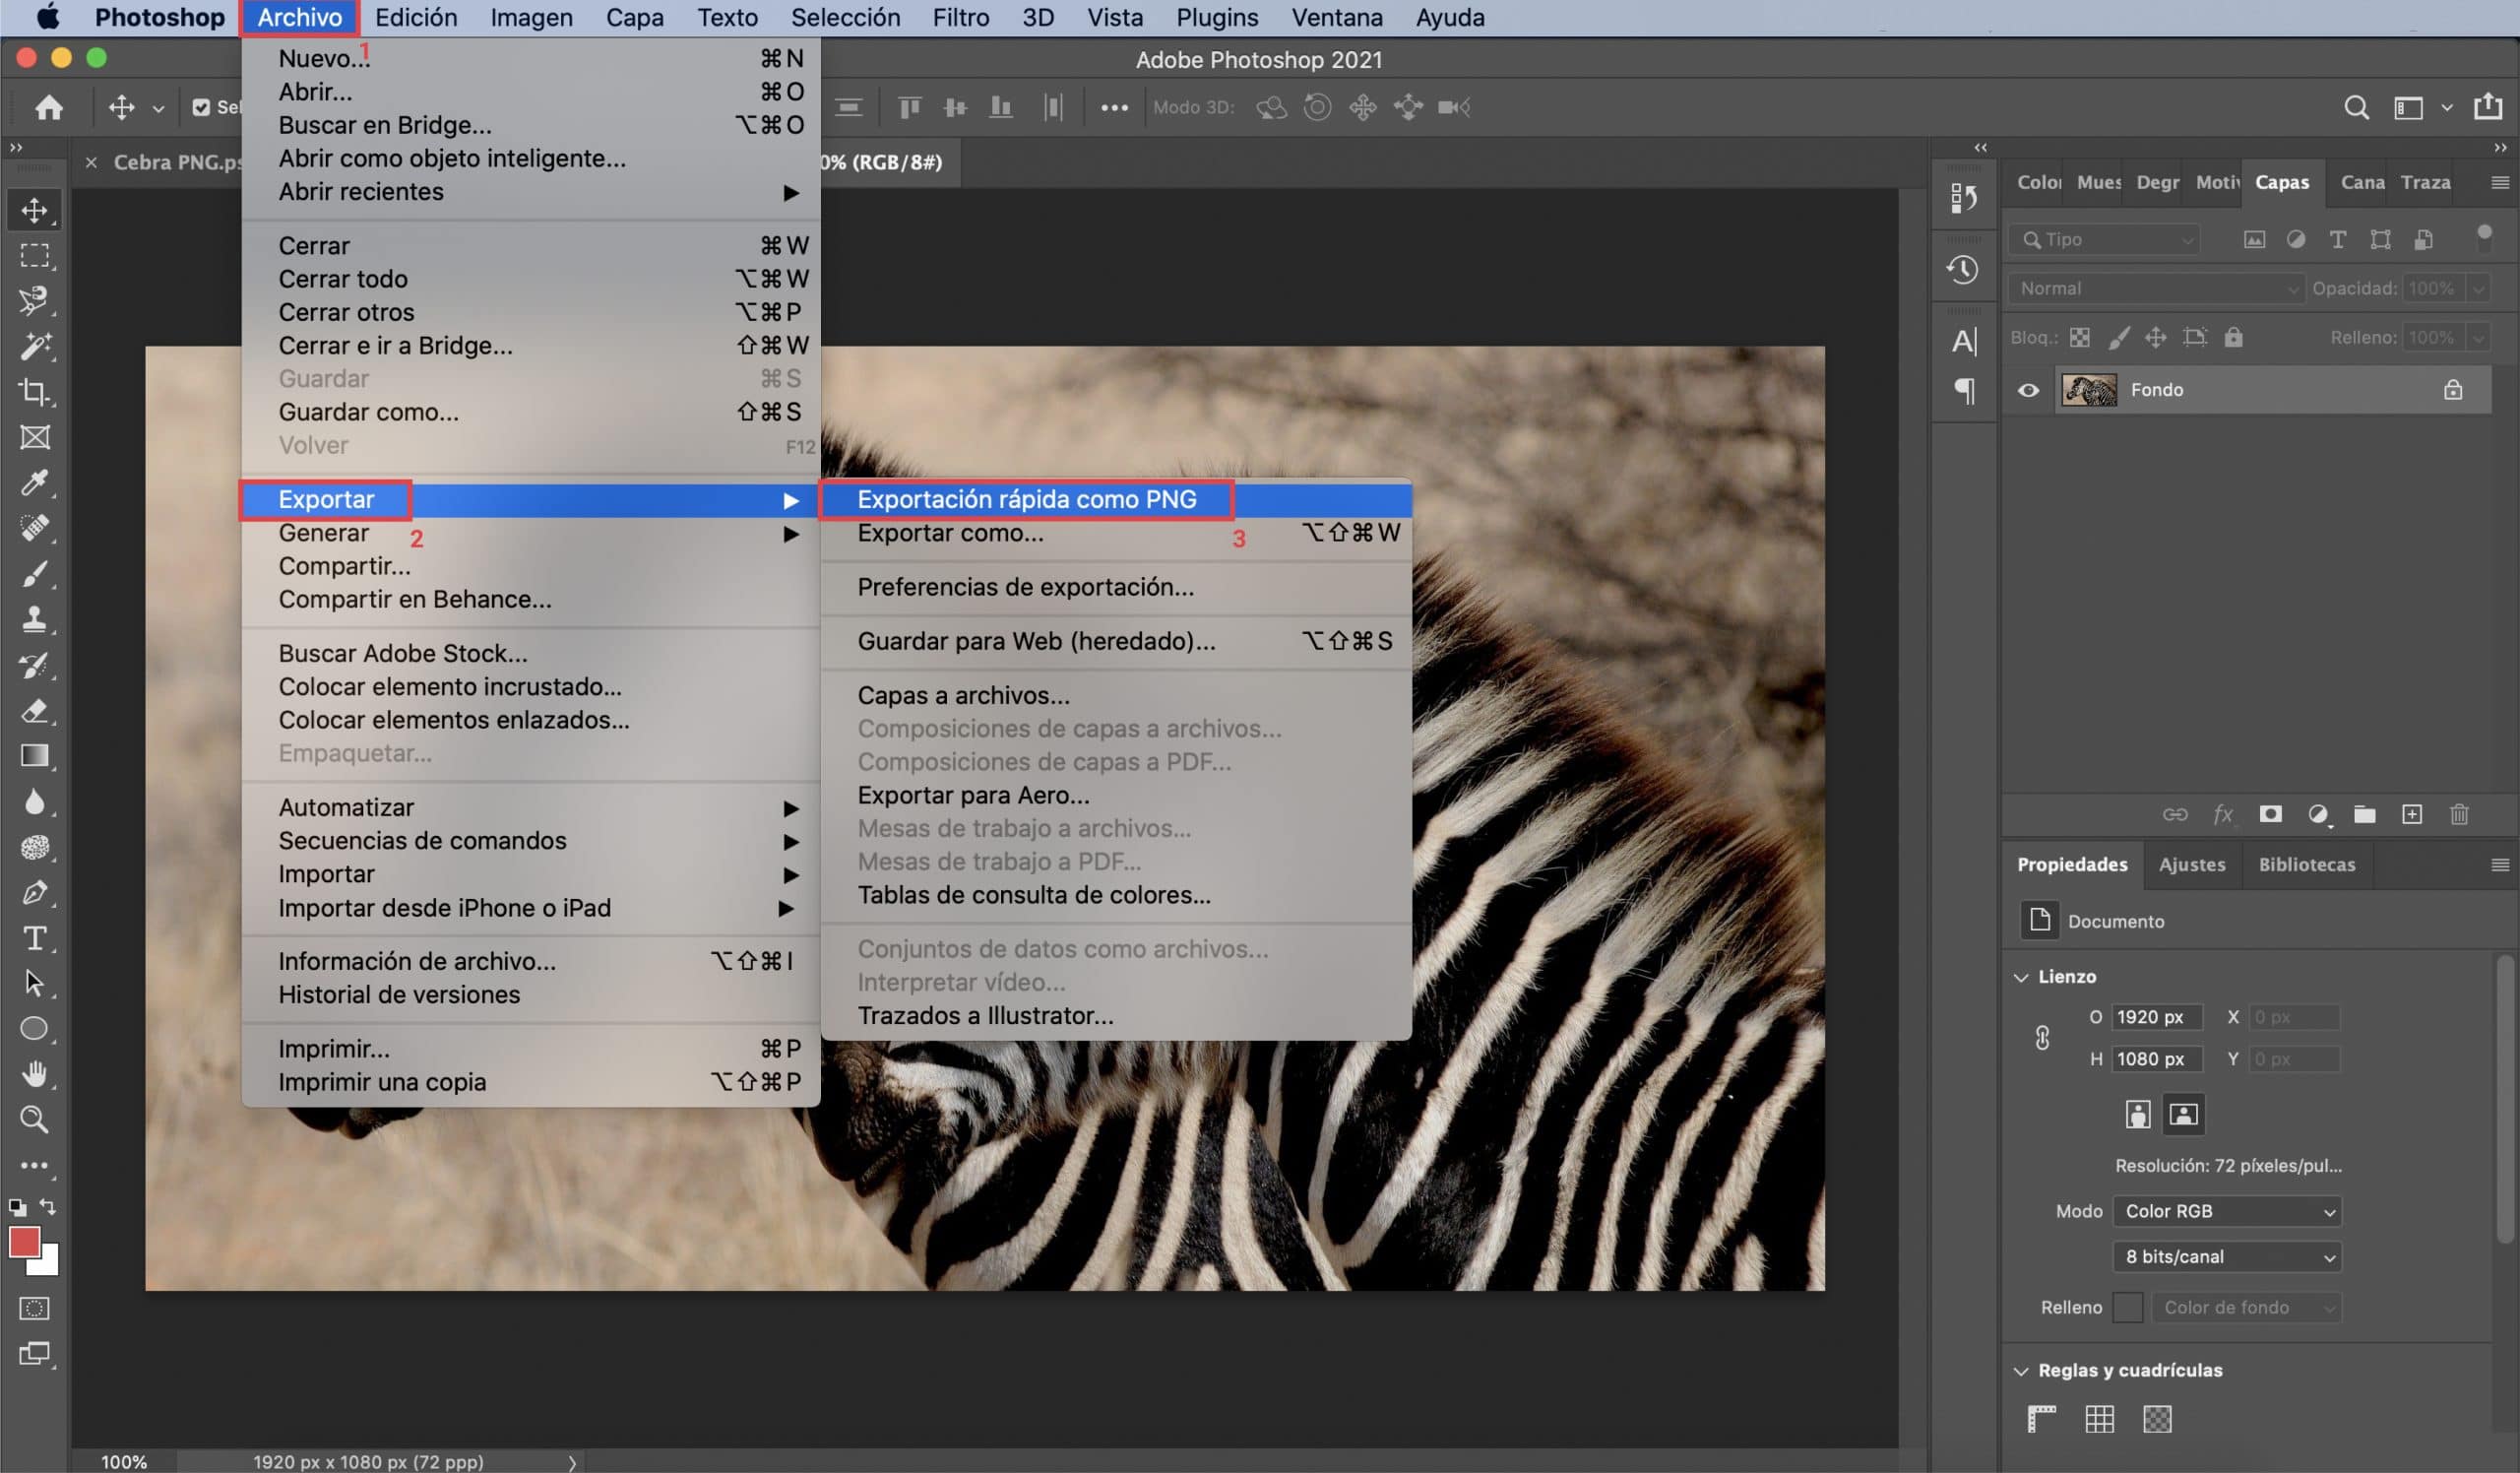
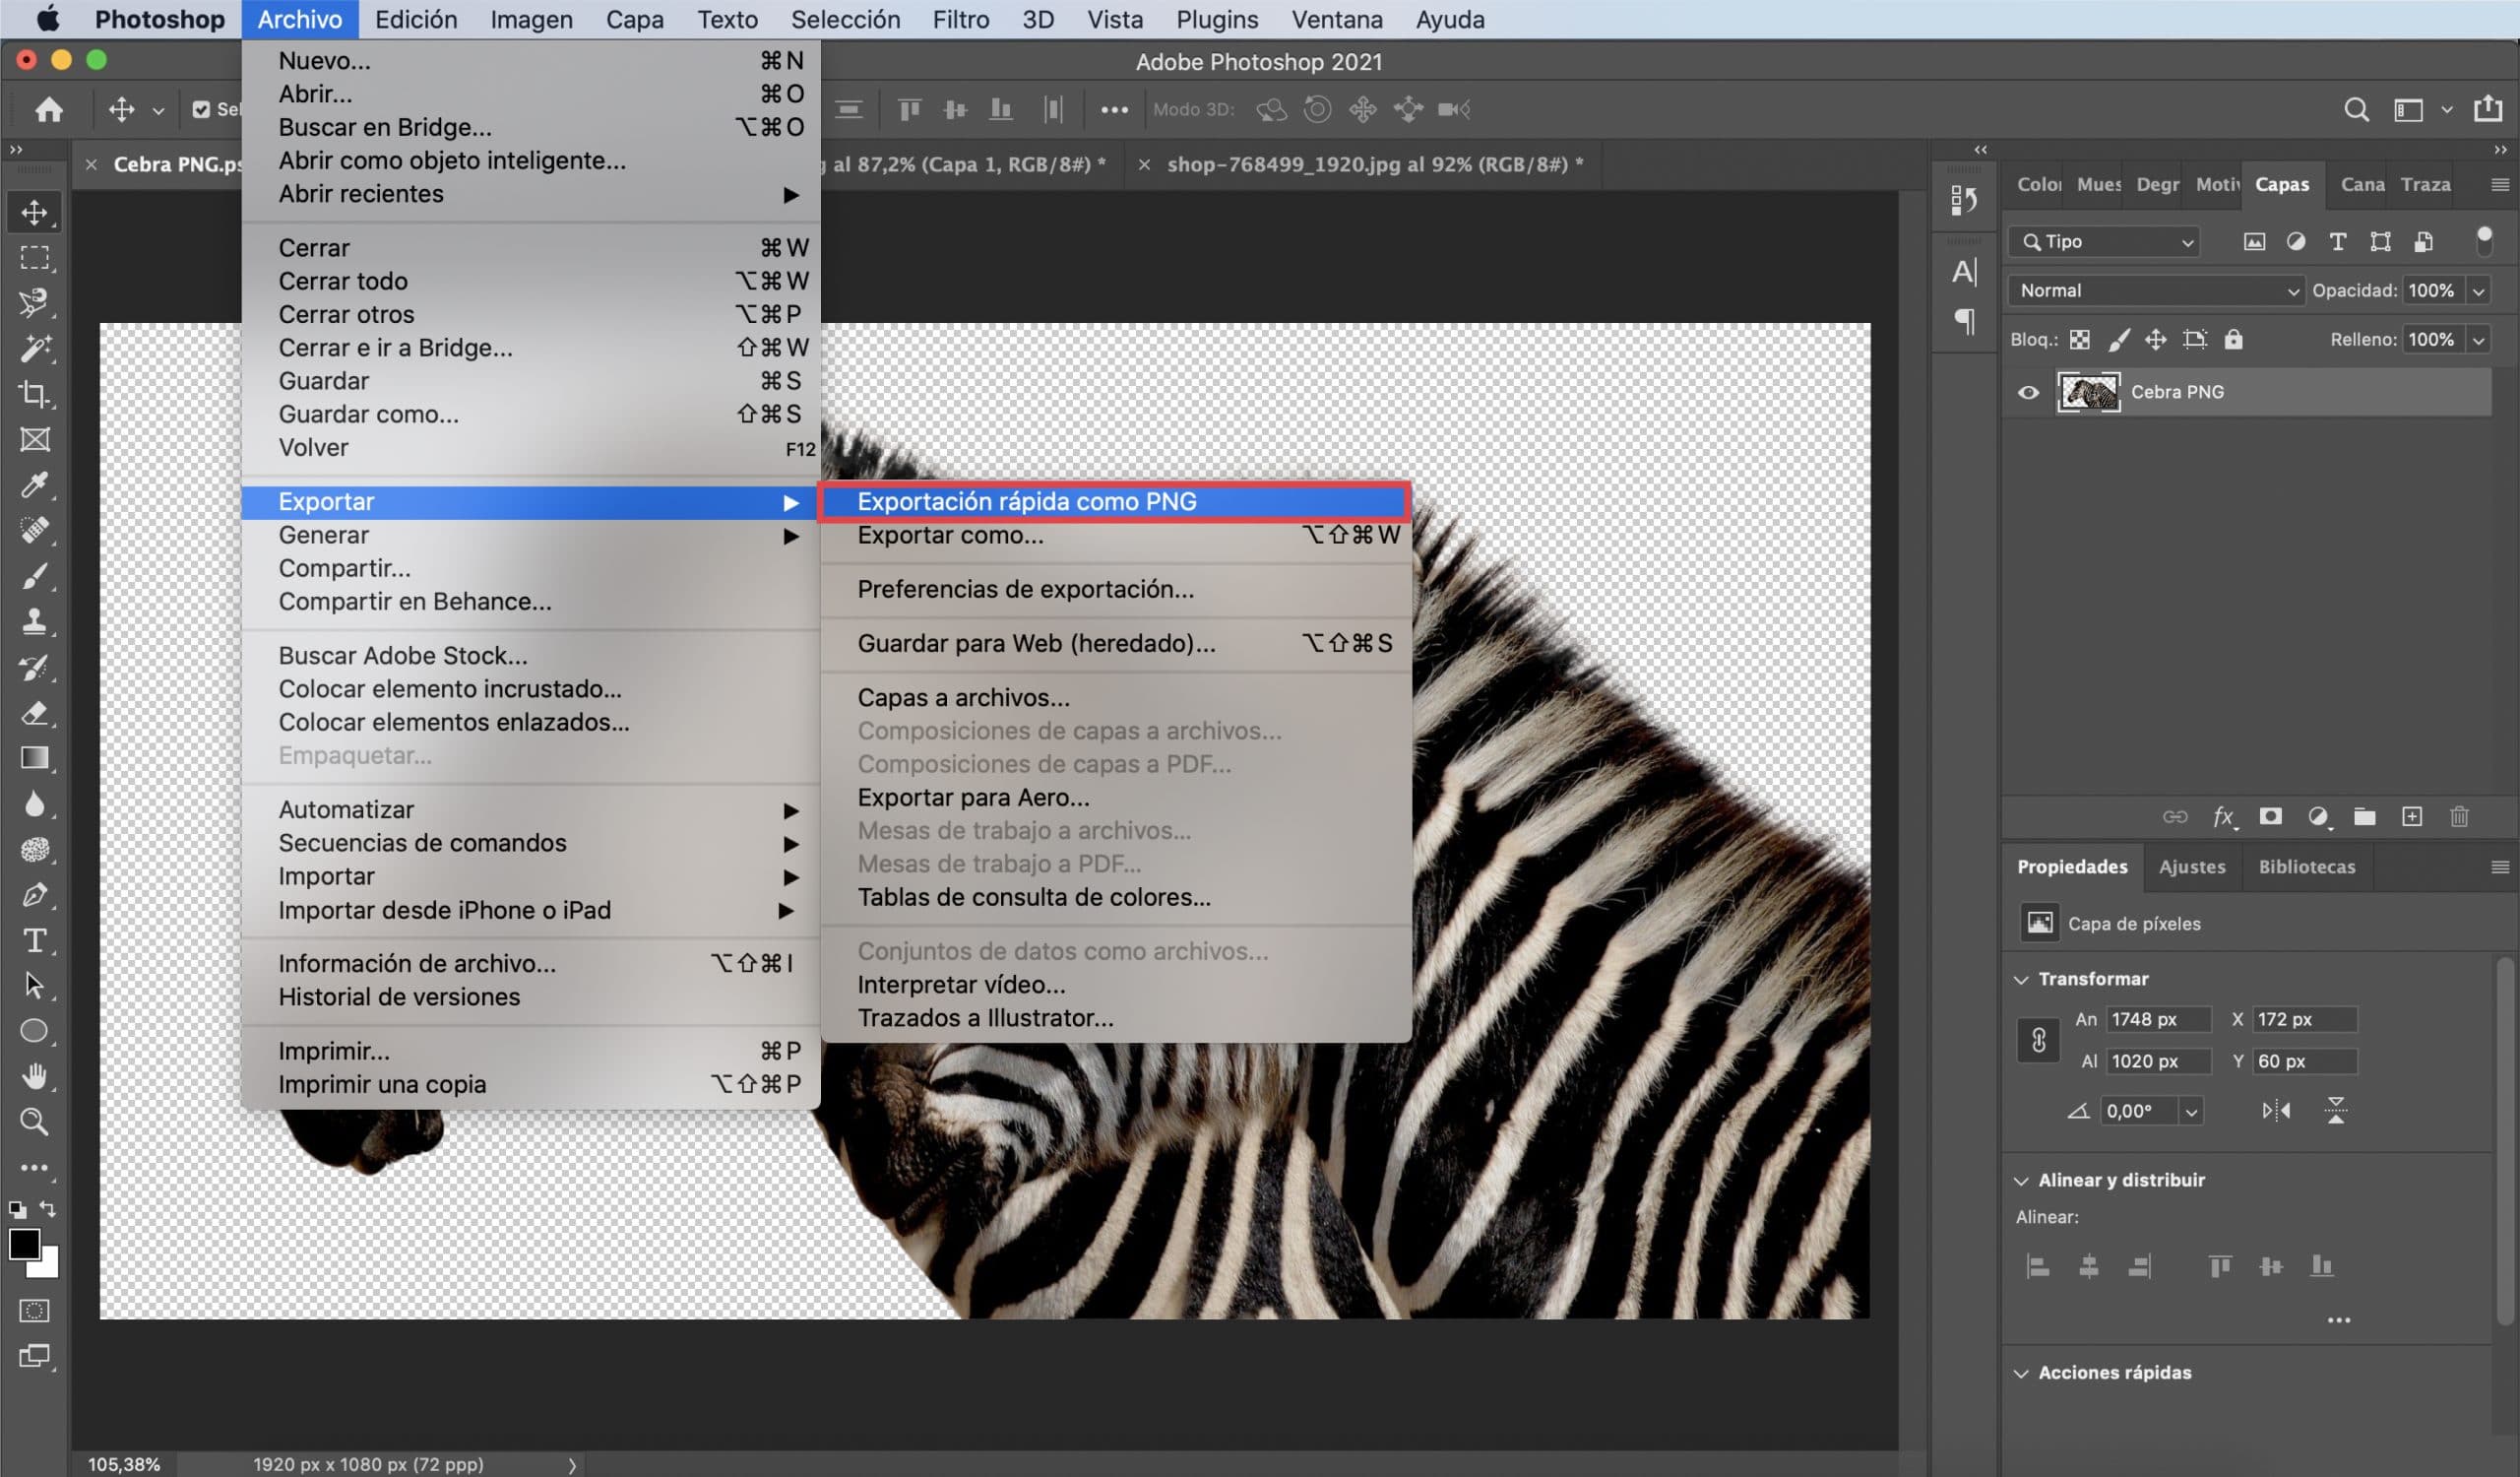
If what we want is, simply, to change the format of an image that we have in JPEG, the procedure is very simple. Open the image you want in Adobe Photoshop and put the cursor over file tab. A menu will be displayed, leave the cursor on the option «export« and click "Fast export as PNG". In seconds you will have managed to change the format of your image to PNG.
Create images with transparent background with Photoshop
We open the image
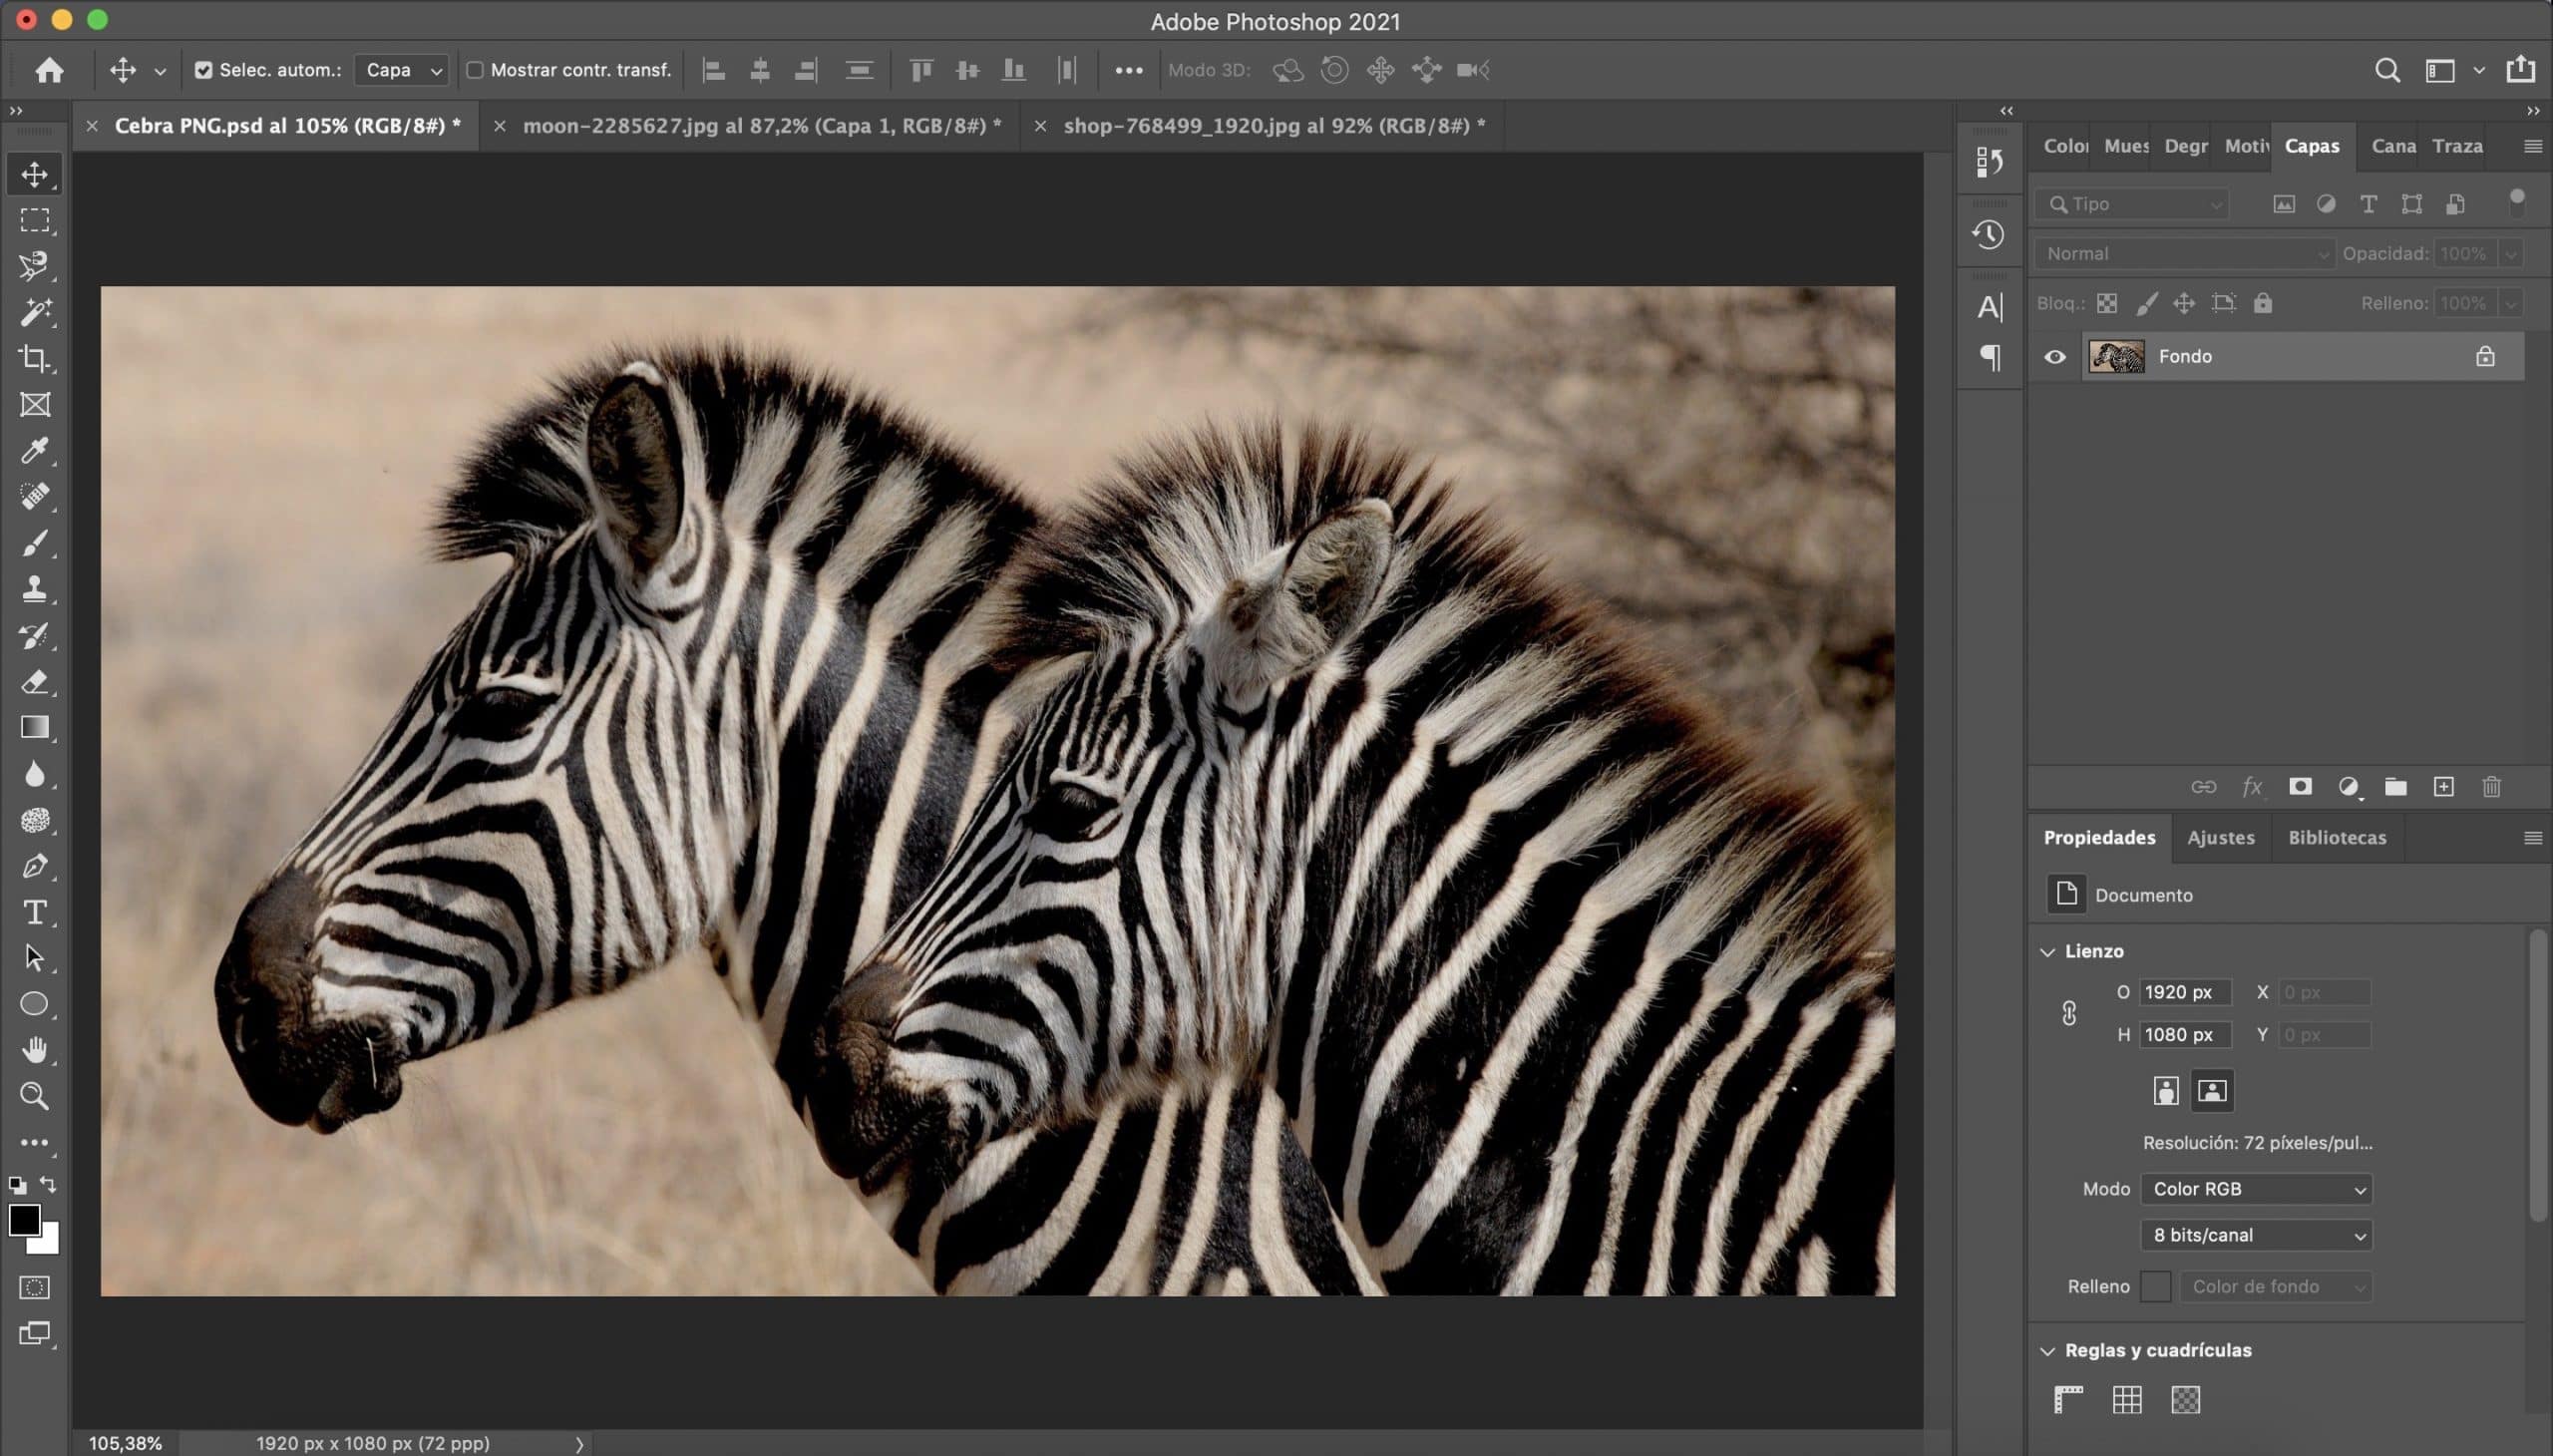
The first thing we will do is open the image from which we want to remove the background. Once open, you will have to select what we want to save of the photograph, in my case the two zebras. There are numerous Selection tools in Adobe Photoshop. I will explain the way to select that is easier for me in these cases, but everything will depend on what you want to select and what you think is most effective.
How to make the selection
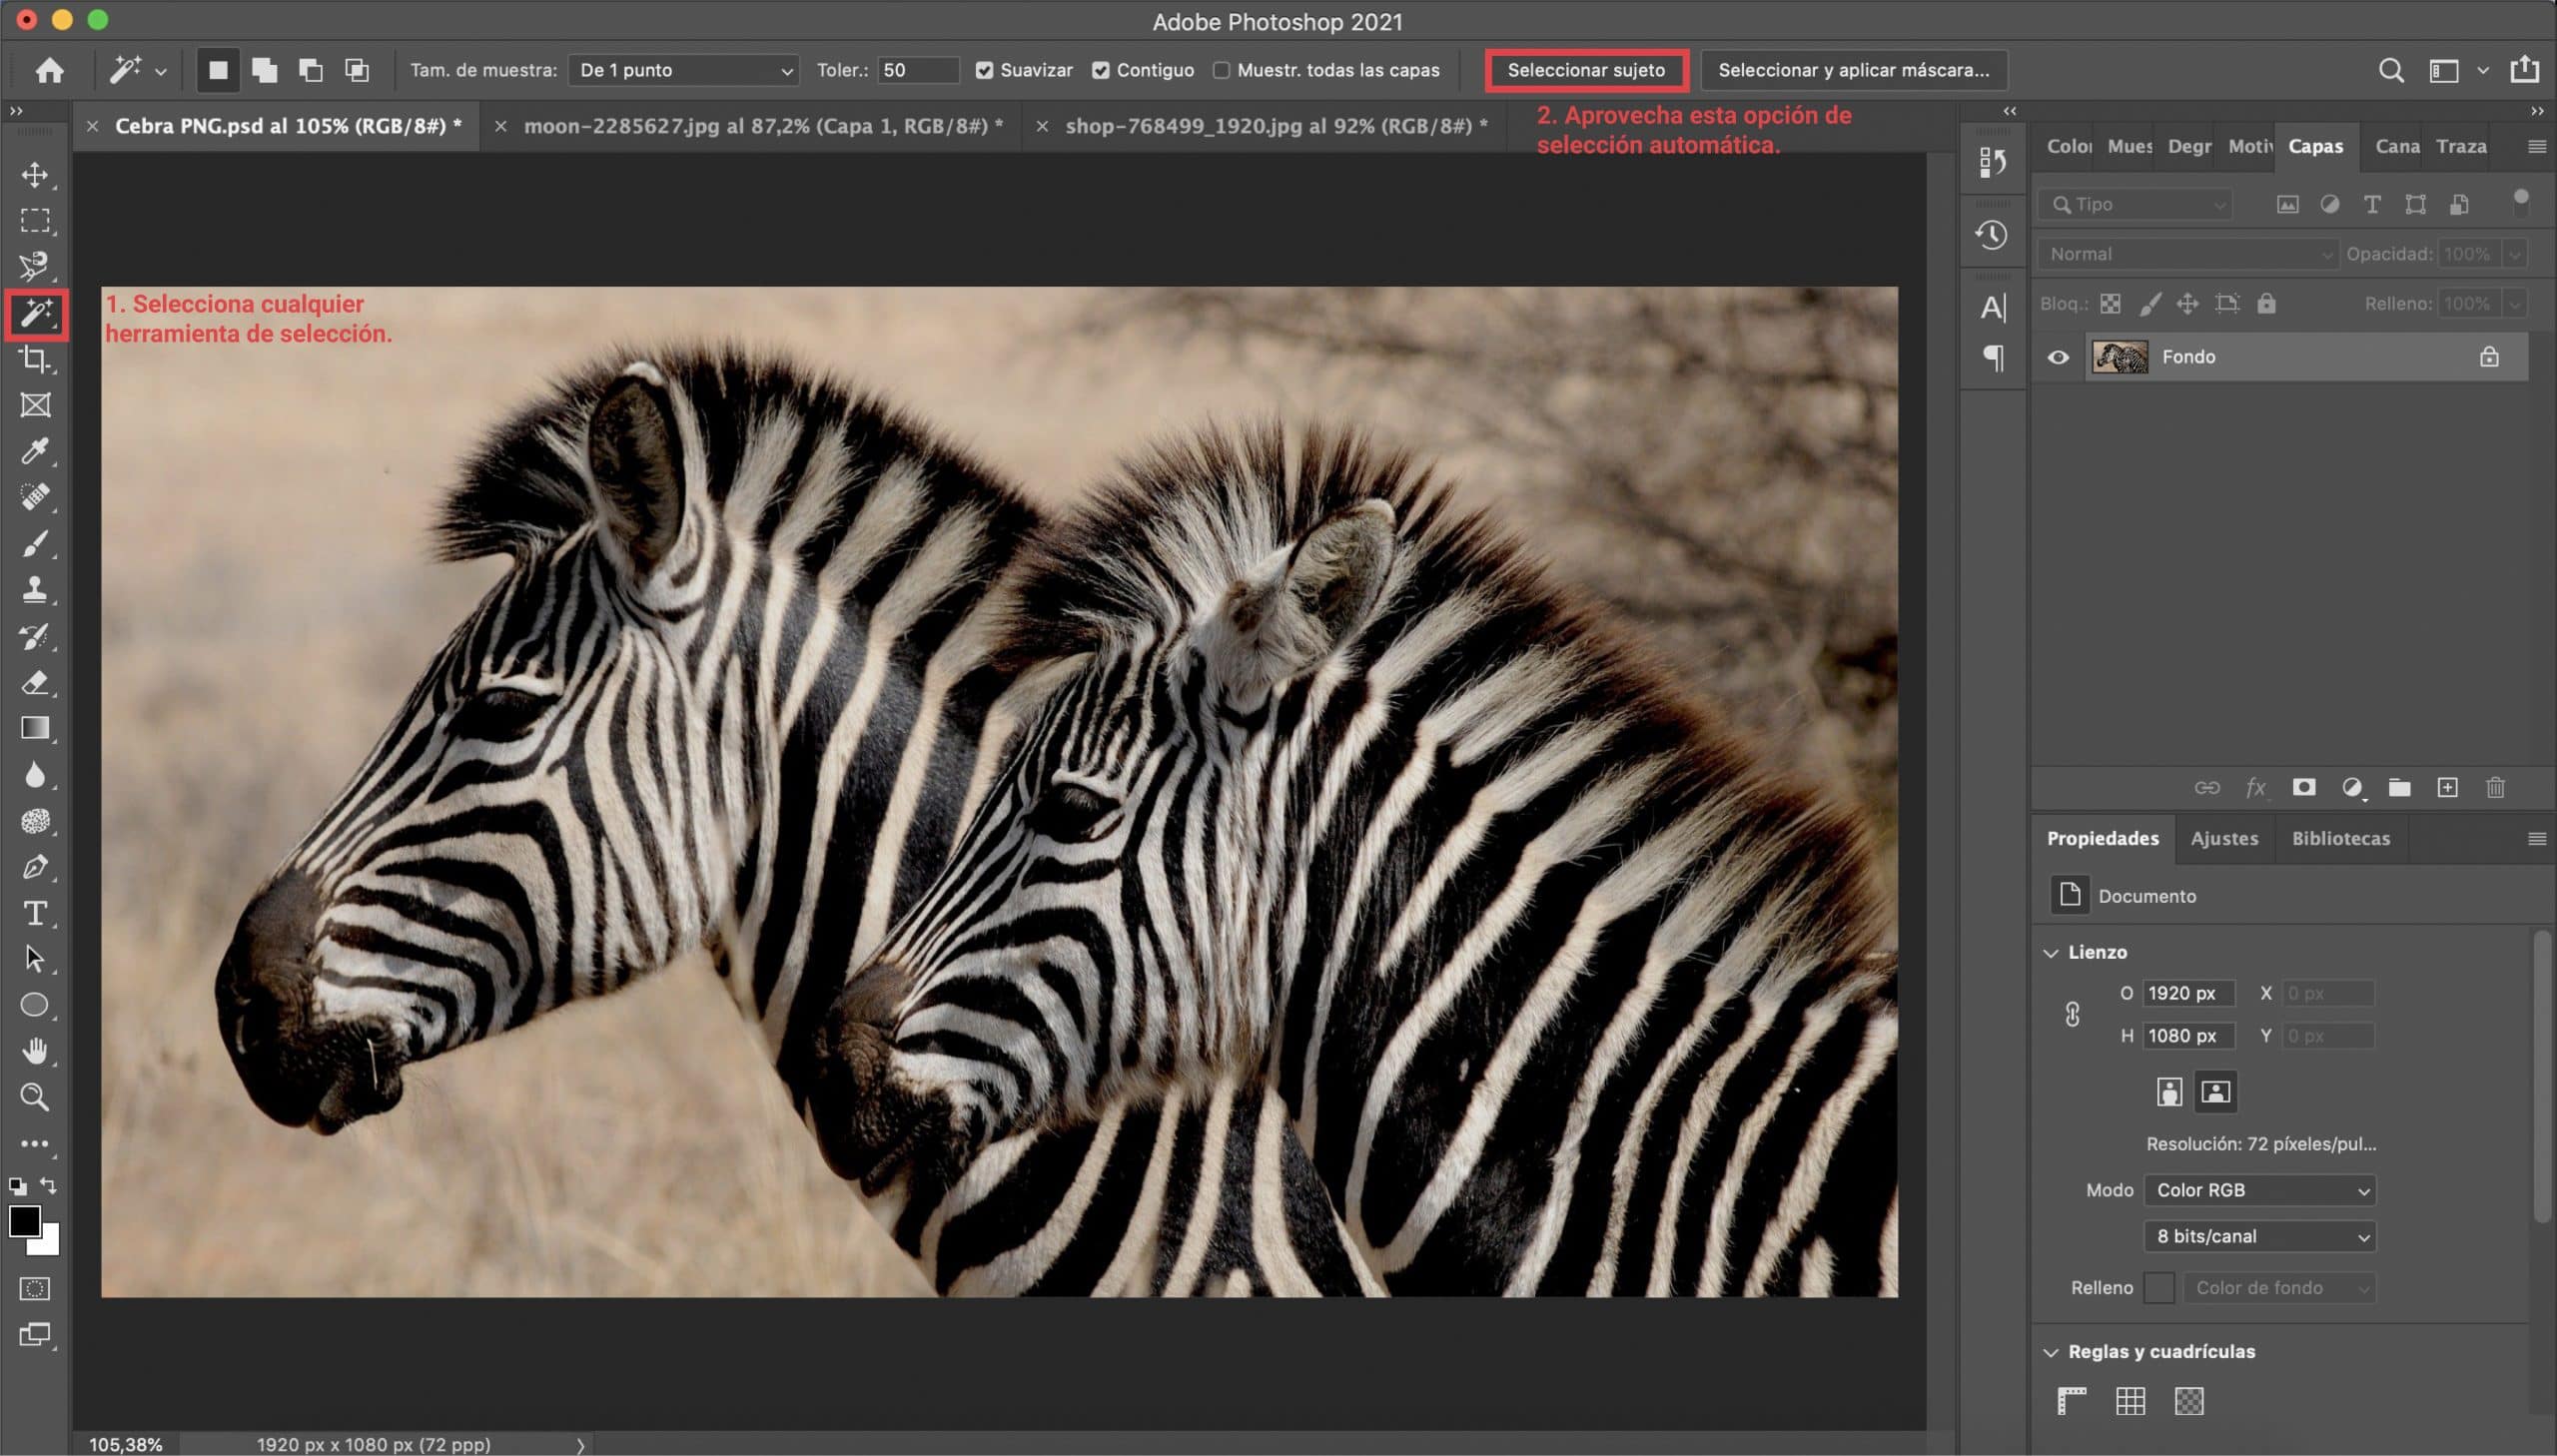
Choose one selection tool any, does not matter. When you do so, a series of selection options will appear at the top of the screen. If you do click on «select subject», Photoshop will make a automatic selection quite approximate, but not usually perfect. Don't worry, those little imperfections are easily solved.
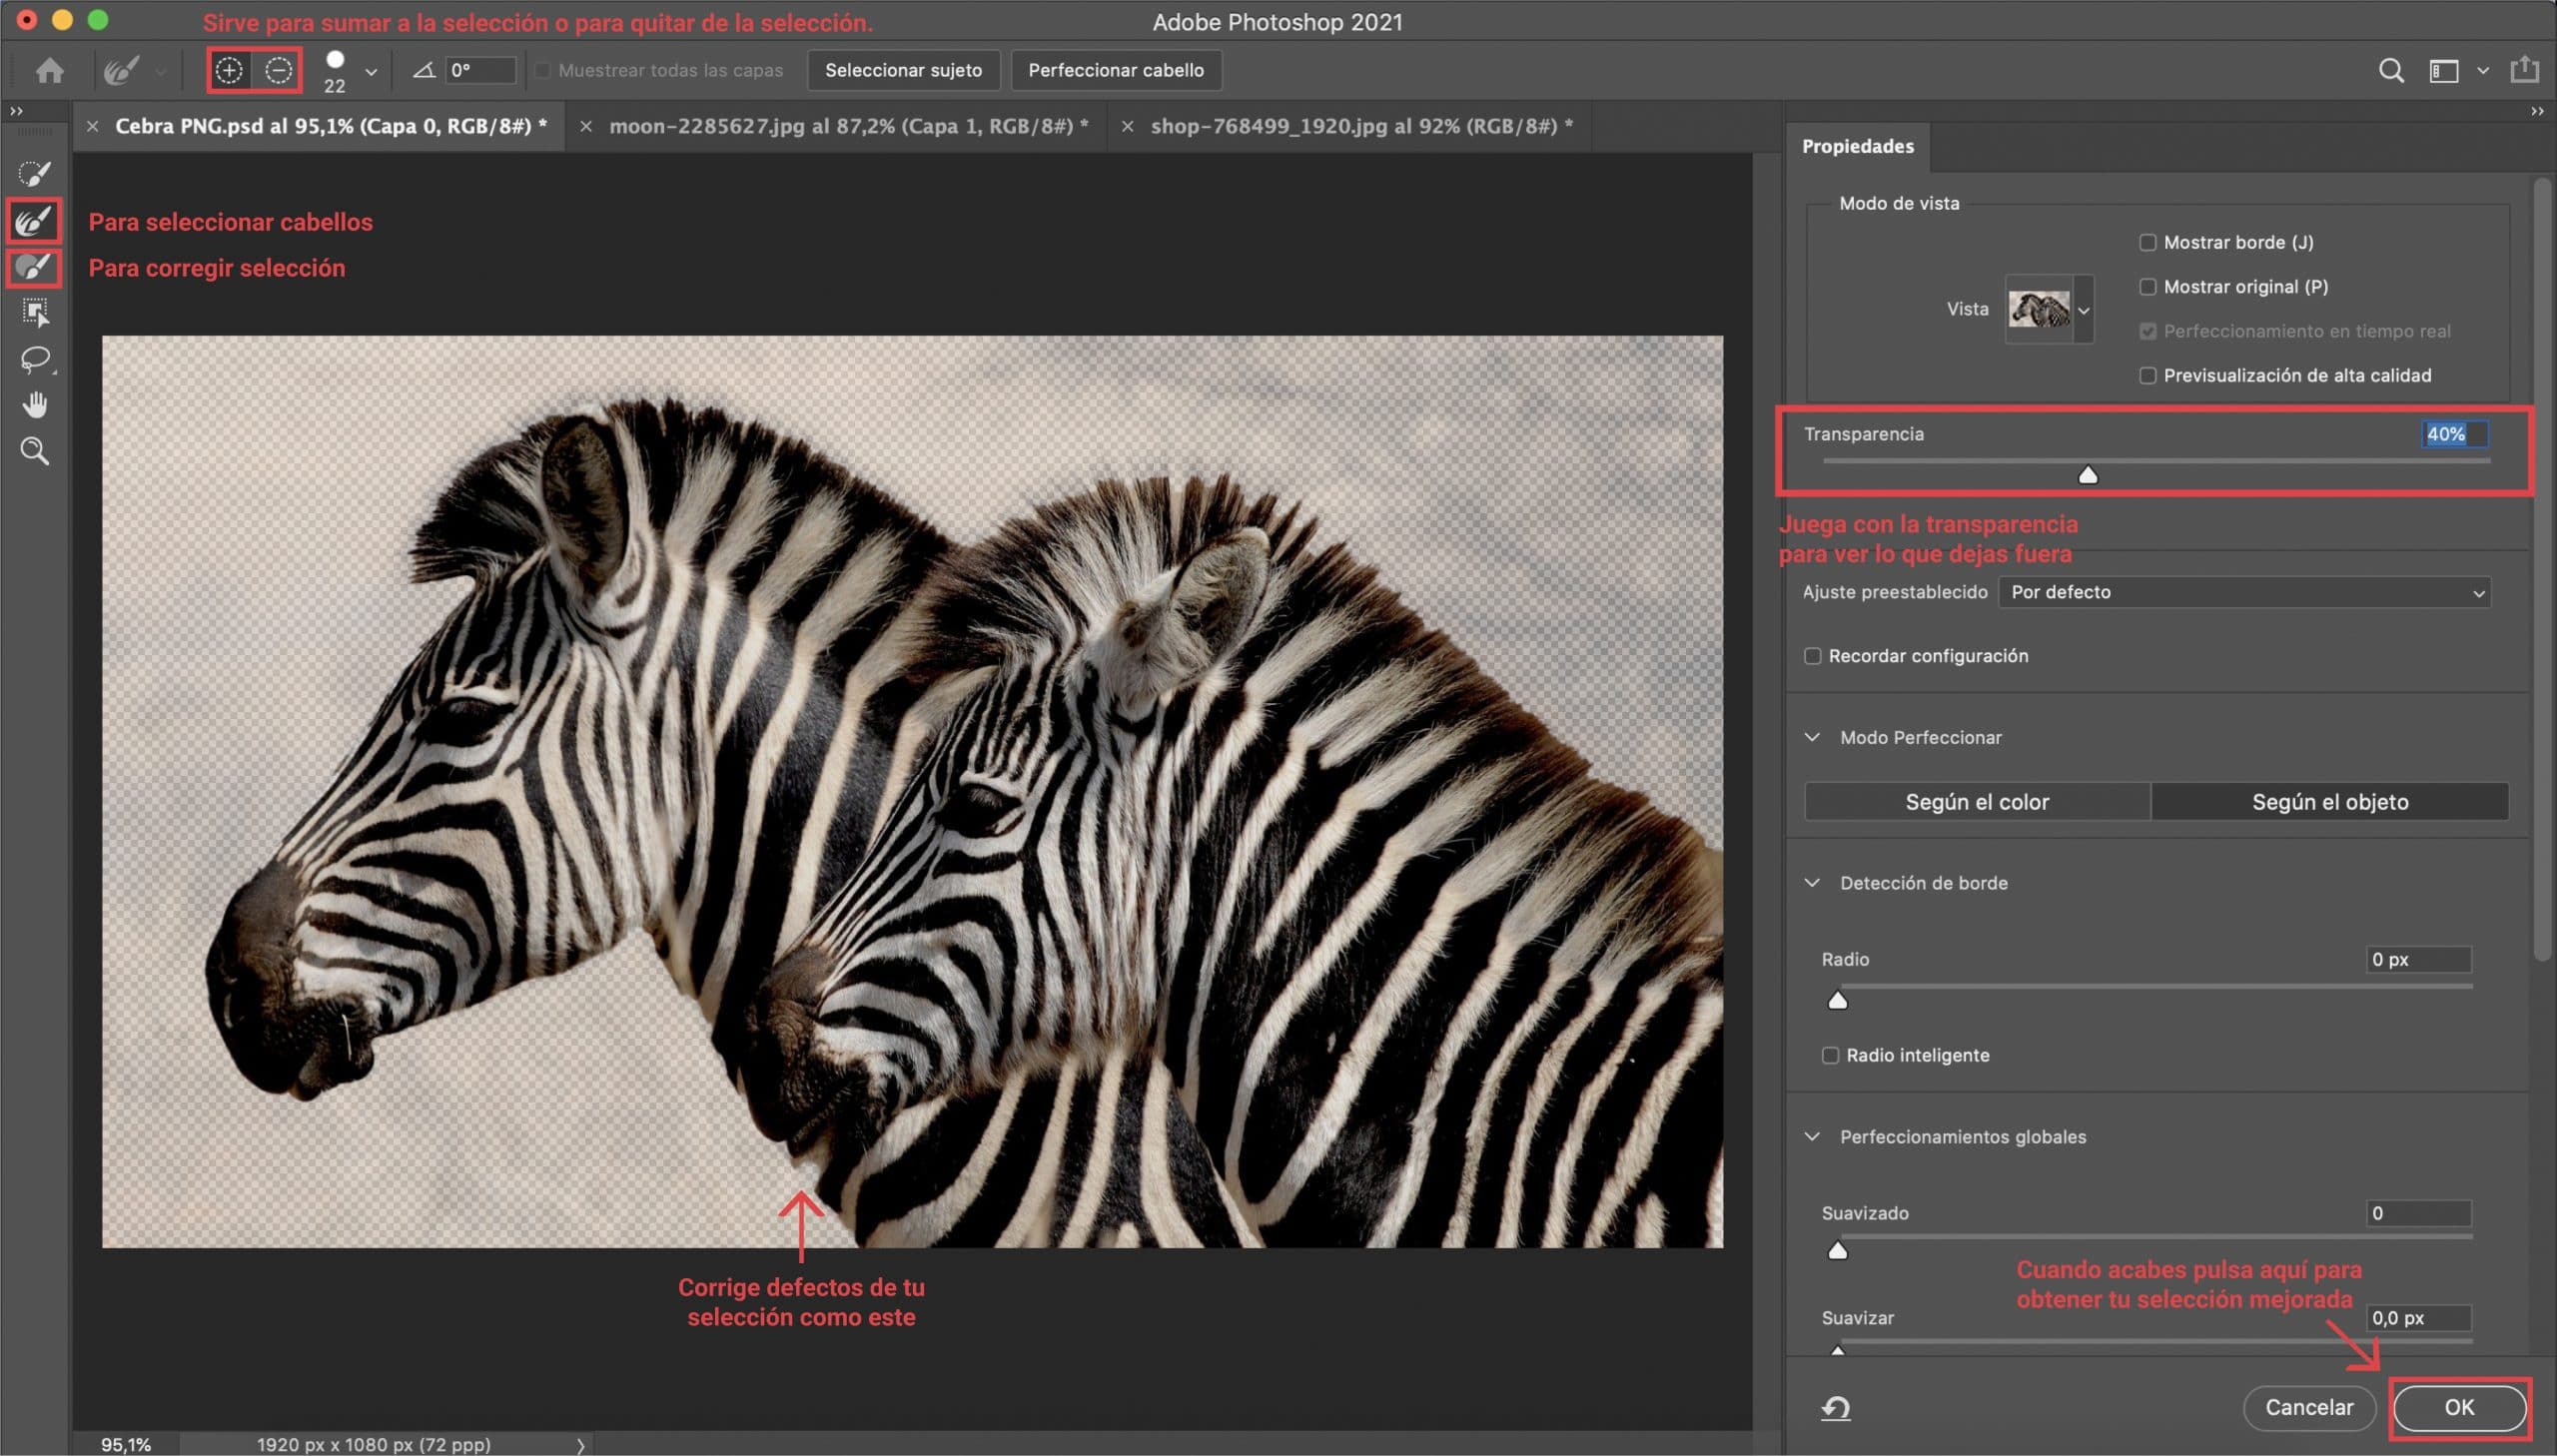
Right next to «select subject» you will see the option "select and apply mask". With a single click you will go to a mode designed for you to perfect your selection. In the tools menu you will see different brushes, there are two tools that for me are essential when it comes to improving selections: «Brush for perfecting edges», ideal for working with hair, and "Brush", very useful to add or remove the content you want from your selection.
When you use the selection mask, I recommend that you play with "transparency", so you can see what you are including in the selection and what you are going to leave out. The symbols "+" and "-", located at the top of the screen, are used to choose whether the brush adds content to the selection or, on the contrary, subtracts it.
Take advantage of these tools, be meticulous and expand to select the edges well. When you are happy with what you see, press "ok" and you will return to the usual Photoshop interface.
How to remove the background
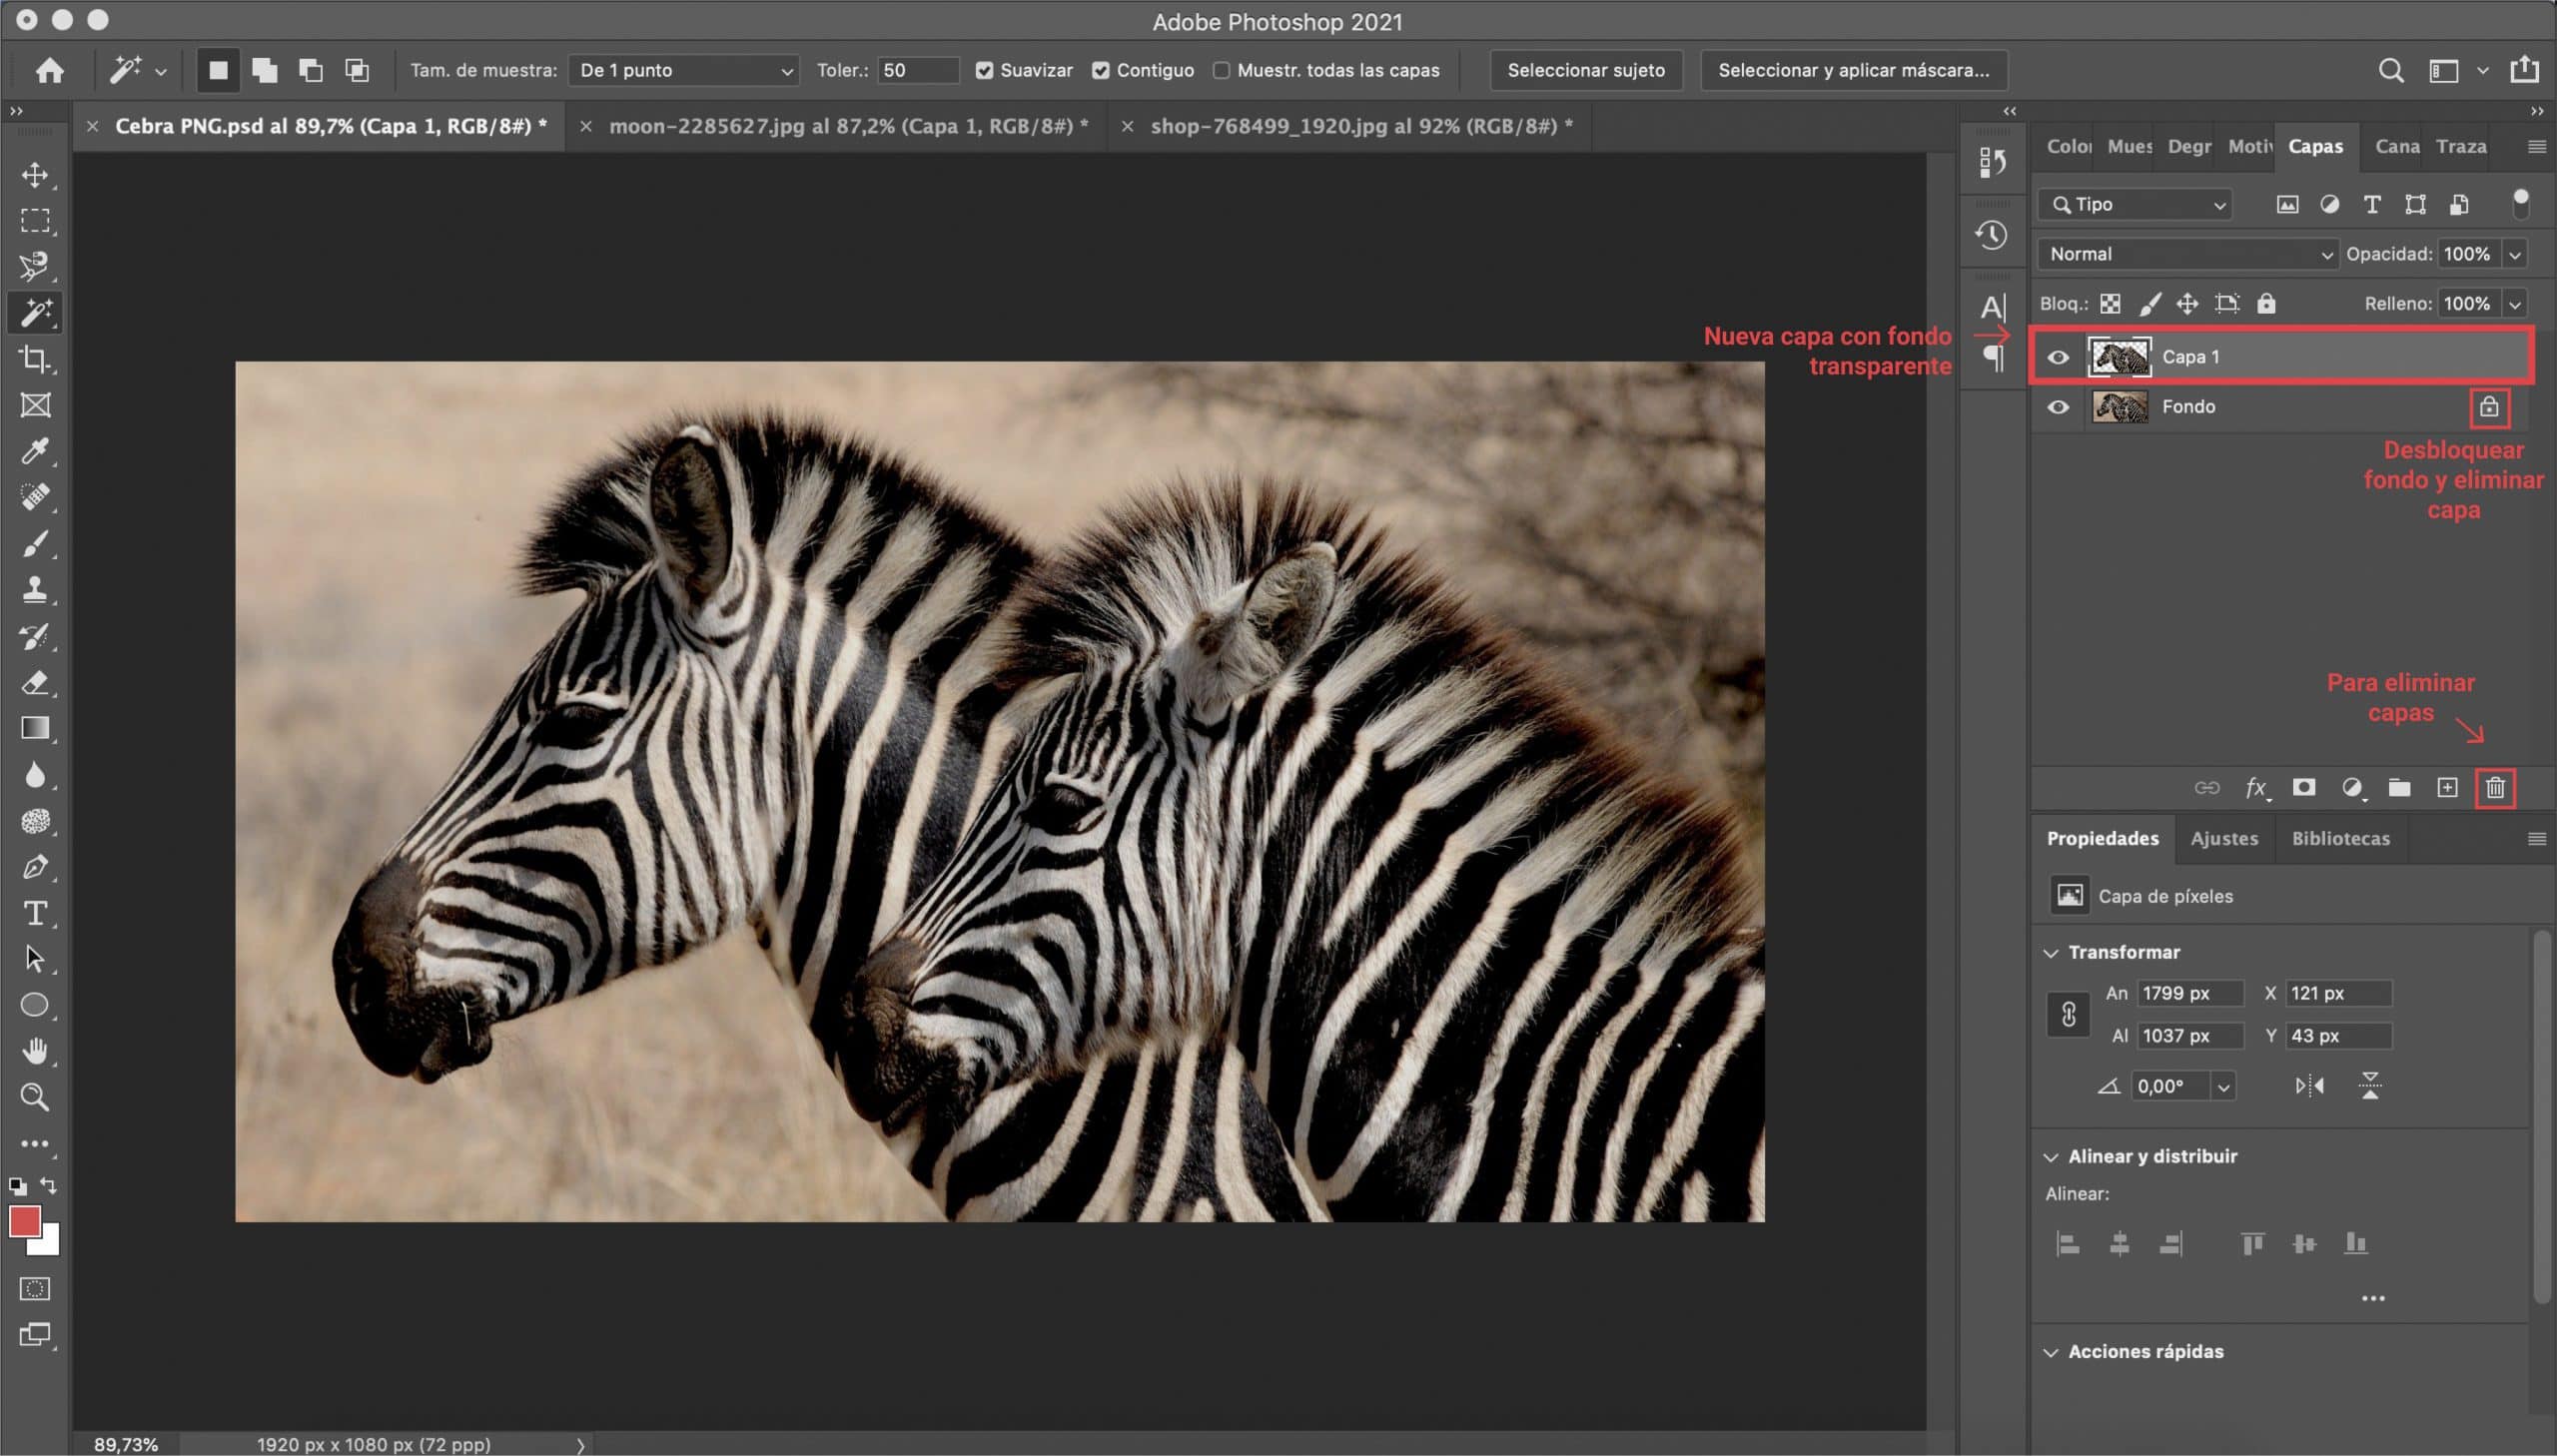
Check that the selection is correct, remember that if you still think that you can improve it, you can always reapply the selection mask. When the selection is made, you just have to press ctrl + C and ctrl + V (if you work with Windows) or command + C and command + V (if you work with Mac). Thus you will be copying and pasting your selection on the background, you will see that a new layer. To end, unlock the background layer and remove it You will already have your image in PNG with a transparent background ready to use it in your designs!


Be careful when saving
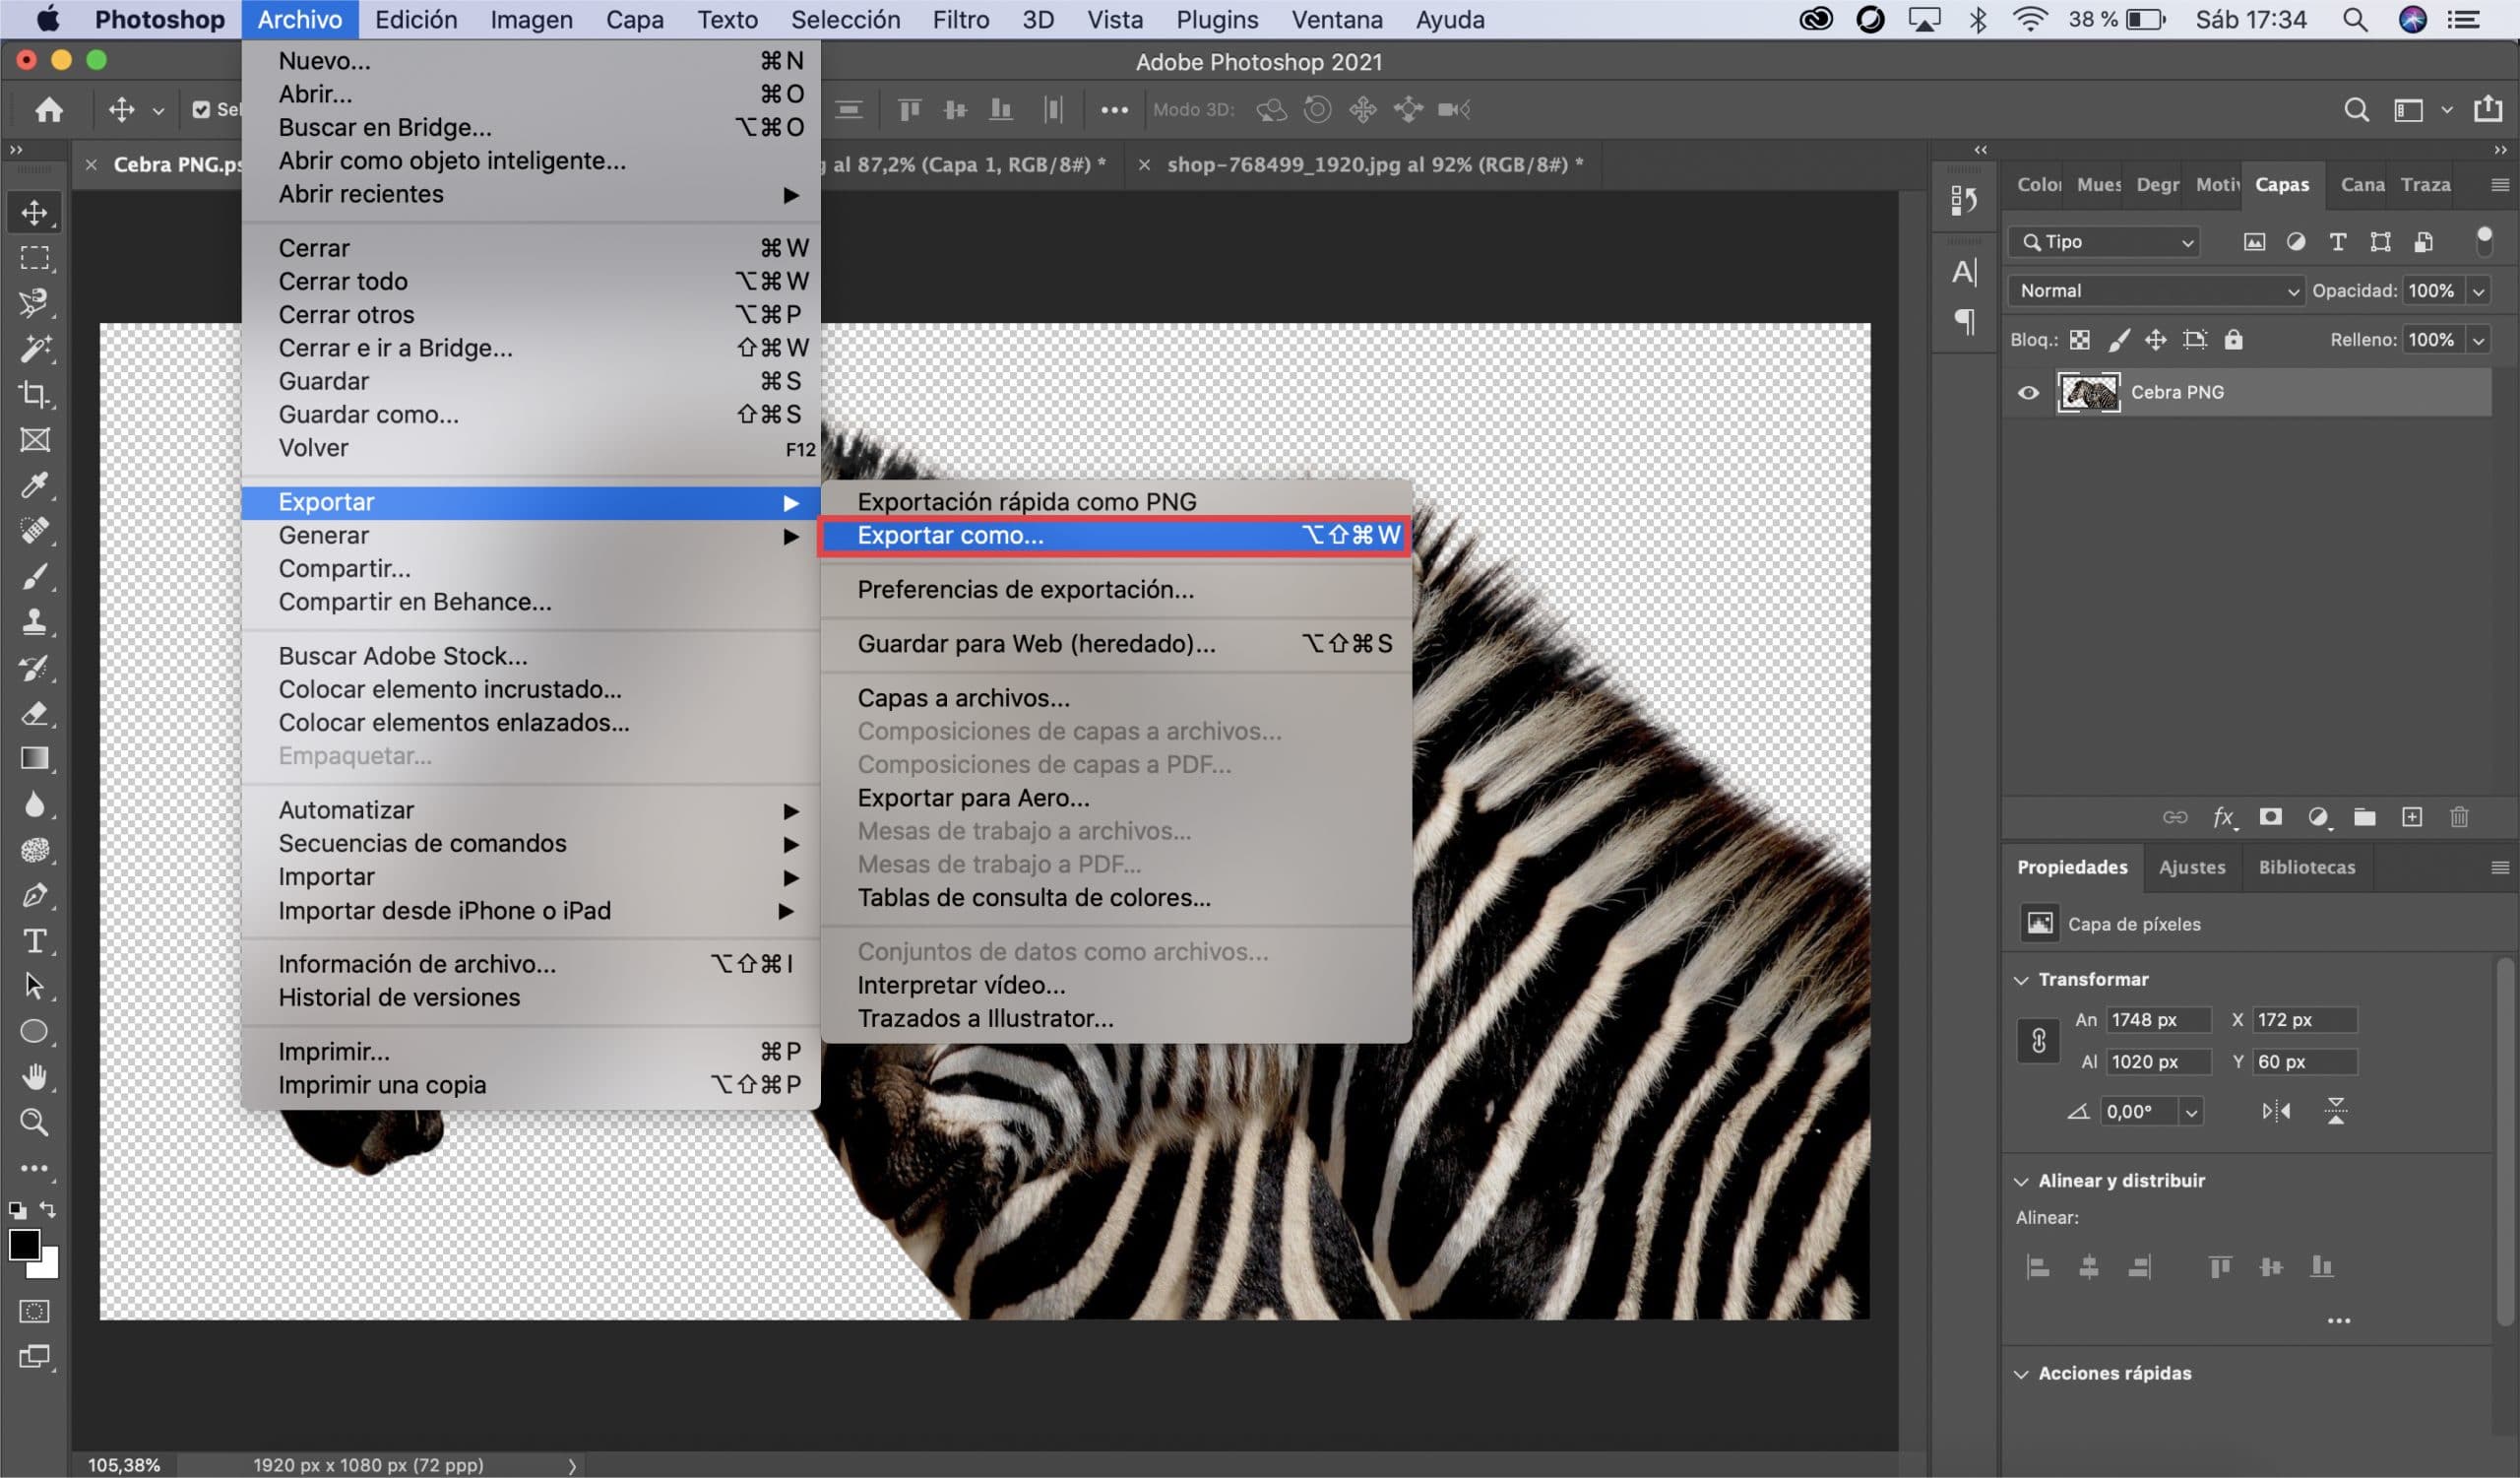
Let me give you one last advice. When you save, pay close attention and make sure you choose the format (PNG) well. If you save in another format, such as JPEG, Photoshop will save your image with a default white background and it may not work for you. I leave you two screenshotsso you can see how you can save the file.
The content of the article adheres to our principles of editorial ethics. To report an error click here!.
How To Create A Png Image In Photoshop
Source: https://www.creativosonline.org/en/crear-imagenes-png-photoshop.html
Posted by: boothereastill.blogspot.com

0 Response to "How To Create A Png Image In Photoshop"
Post a Comment